This guide assumes that you already bought a subscription, if not BUY IT!
Step 1: Log-in to AzarineGuard
Log-in to Central (Dashboard)
Log-in to Central (Dashboard)

Your API Key must look like: AZG_XXXXXXXXXXXXXXXXXXXXX (25 Characters)
Two Factor Authentication
Two Factor Authentication
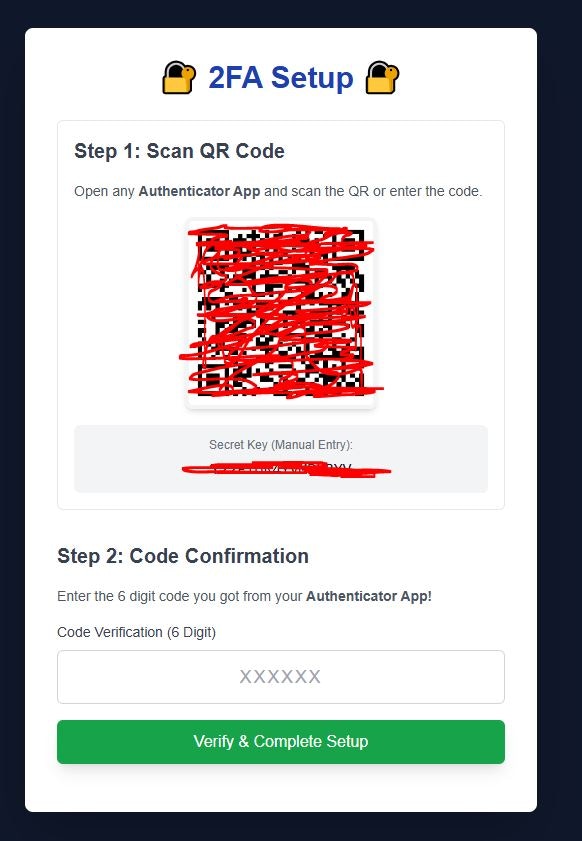
Setup Steps:
- Install Google Authenticator
- Scan the QR Code provided by AzarineGuard
- Enter the code displayed on the Authenticator
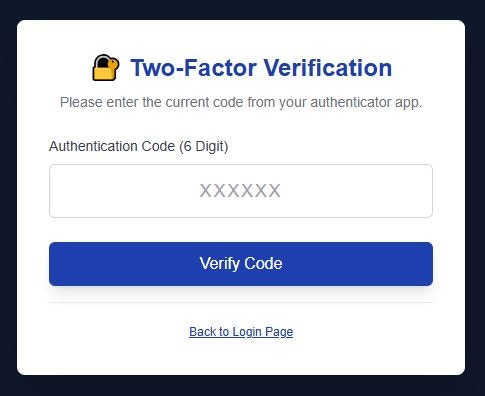
Normal Steps:
- Open your Google Authenticator
- Enter the code displayed on the Authenticator
Step 2: Manage Scripts & Folders
Create a Folder
Create a Folder
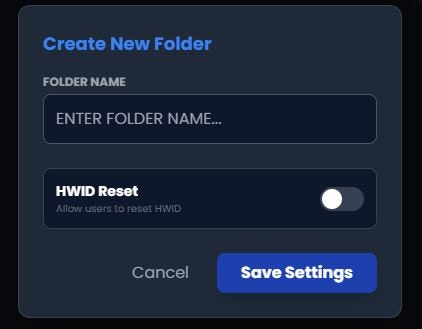
Creating Steps:
- Kindly, click on + on your left side of the Scripts Page
- Enter some details about the folder*
Upload a Script
Upload a Script
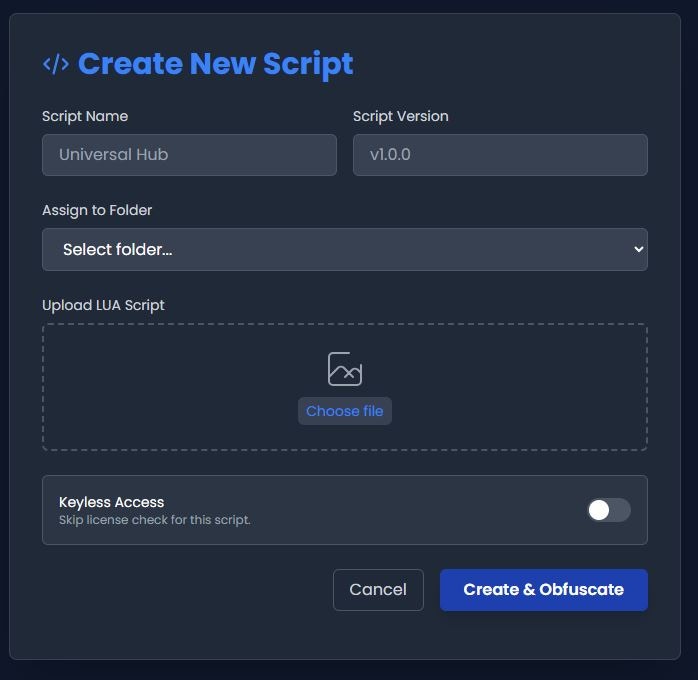
Creating Steps:
- Kindly, click on Create New on your right side of the Scripts Page
- Enter the name for your script
- Enter the initial version (It’s a string)
- Assign it to a folder that you just made
- Upload your script in a Lua (5.1 is better) format
- Decide if this script is keyless (you can change it later)
Editing Scripts / Folders
Editing Scripts / Folders
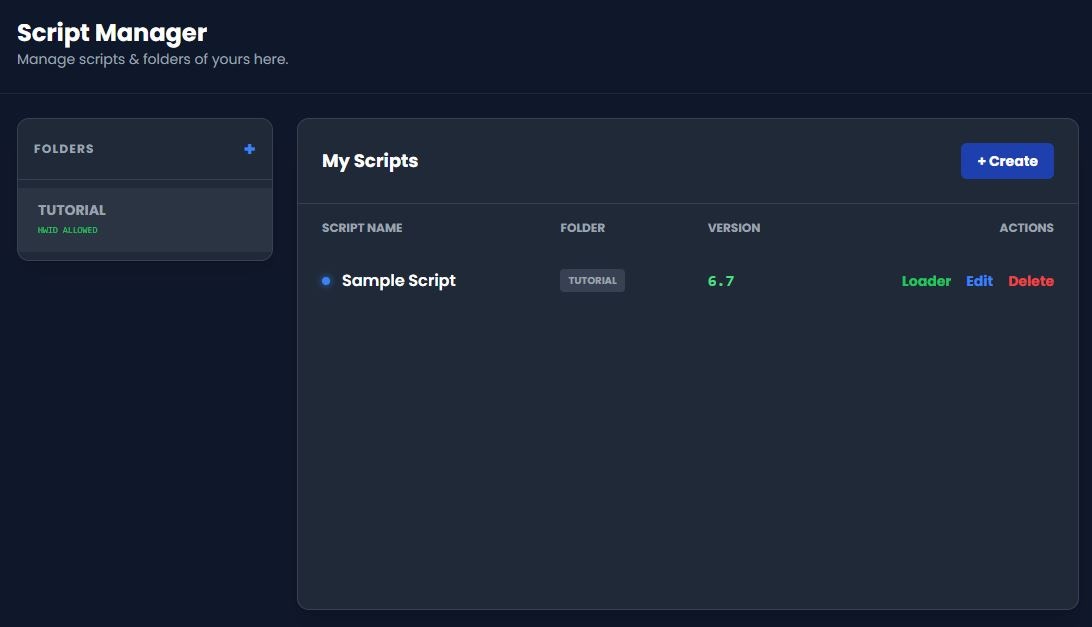
Folder Actions:
- You may Edit your Folder HWID Reset Allowance & Name. NO DELETING!
Script Actions:
- You may see Scripts Name, Folder, Version, and Loader.
- If you do want to change it, click on Configure
- If you want to delete it, click on Delete (NO UNDO)
Step 3: Manage Keys
Remember,
-1 as a duration always meant LIFETIME You have to REDEEM keys at User Portal / Discord Bot to use it!
Select a Folder
Select a Folder
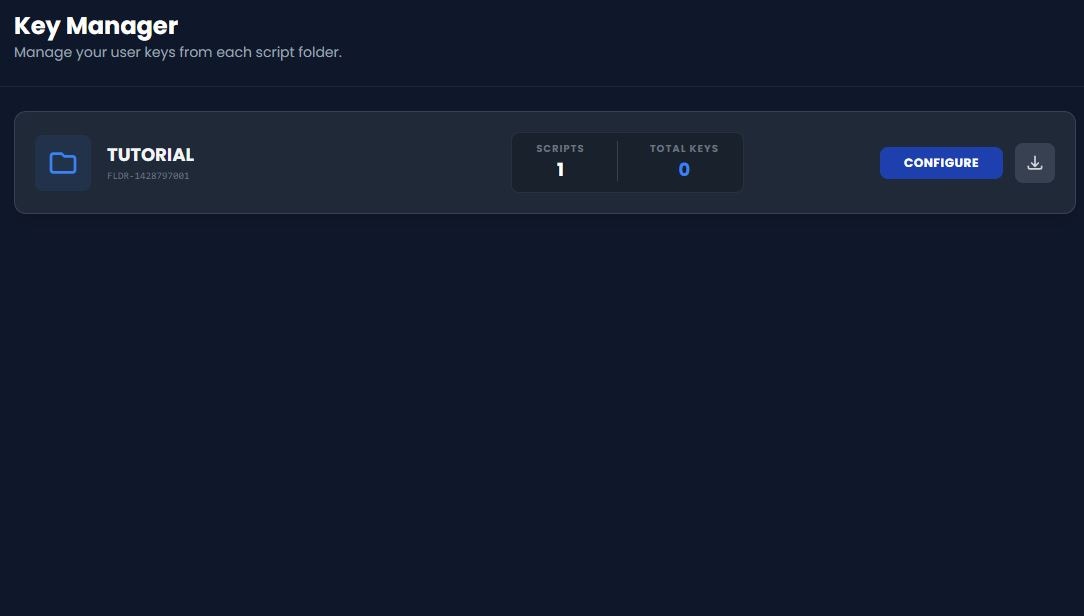
Manage Keys from Folder
Manage Keys from Folder

Page Functions:
- You can see Key, Status, Banned, Expiry, HWID in the explorer
- You may search for Keys on the top-right search bar
- You may change entries shown from 10 - 100 per page
- You may downlod all keys by clicking the Download button
- You may generate bulk keys by clicking the Generate button
- You may import keys in JSON by clicking Import button (good for migrations)
Next steps
Now that you’ve learned the basics, explore these key features:Setup Discord
Learn how to integrate AzarineGuard to your server.
Setup Monetization
Monetize your scripts and reward your users after ads.
Using Macros
Integrate AzarineGuard built-in macros such as Runtime Variables.
Discord Server
Join our official community for help and support.
Need help? Join our official discord community.